


Last Reviewed:
July 24, 2026
| Everyone desires a straight, ripple free body but few are able to achieve it. Perfect body work calls for the right sanding blocks and sometimes you have to fabricate them yourself. Having the proper tools is the key too every successful job and when it comes time to paint you will want to consider some of the products and equipment marketed through our Business Directory.
Last Reviewed:
July 24, 2026
|
|
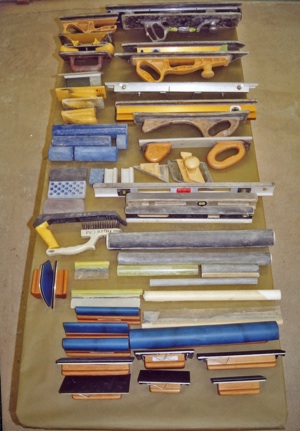 |
1. You will want a wide variety of shapes and sizes to get the desired results. Here is a table of some of our sanding blocks. We have 27 others for color sanding paint before polishing. Here are some but we have more. Some you can buy and some you will want to make yourself. |
 |
2. We use Rubatex Rubber to make our blocks. Be aware that if you leave 40 or 80 grit paper on the blocks too long the glue from the paper will come off on the rubber. However it can be cleaned off with paint thinner and a scraper. The best practice is to remove the sand paper from the blocks when you clean up for the day. |
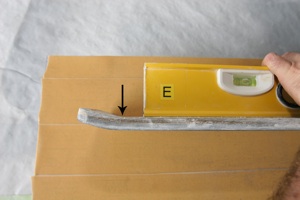 |
3. On long sanding blocks (13 inches or longer) we curve the ends like a sled runner to keep them from digging in, thus eliminating dips. You can warm up the Lexan with an infrared lamp along with a jig of the desired shape. Allow it to cool slowly to prevent distortion. |
 |
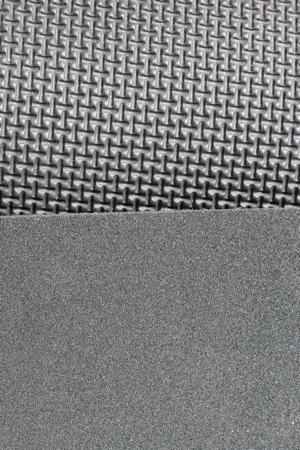
4. To get good results you will have to maintain your blocks and sharpen them on a regular basis. We run our blocks on this near perfect surface to smooth out the Lexan before we put on the rubber and then we do it again after the rubber is on. This keeps the rubber in good shape. |
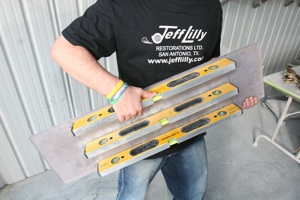 |
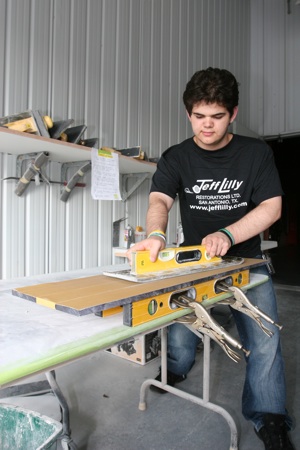
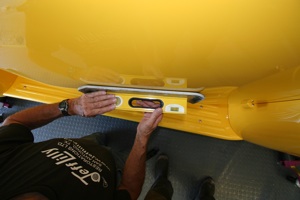
5. Here is the bottom of the Big Block. We use three, two foot quality levels on a piece of Lexan to create a good surface for maintaining our blocks. Twenty-four inch blocks are usually long enough for any job. |
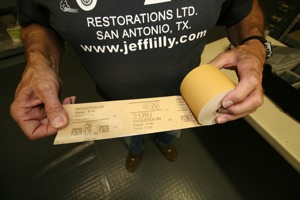 |
6. We use 3M "gold stick-it" paper to sand fillers and primer paint and we buy rolls of 80 to 500 grit paper to refine and shape. |
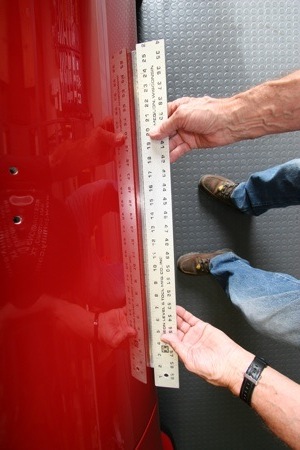 |
7. You will need a good straight edge for your body work. Regardless of the contour of the metal the straight edge will be needed to find reference points. We find that if we can make high or low spots flat over a 13 inch span they will be unnoticeable. For smaller spaces you will have to work harder and larger areas, such as on the fenders of vintage cars, are easier to perfect. |
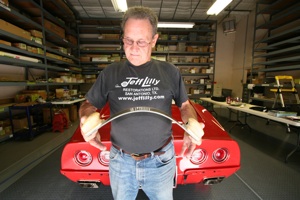 |
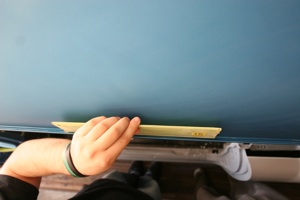
8. This block flexes so easily it only takes a lignt pressure on each end to make contact. We made this block by attaching small blocks on the ends of a long piece of one-eigth inch Lexan and made it wide enough to accept two pieces of sand paper. We padded it with a piece of Rubatex and used contact cement to hold it together. |
|
|
|
 |
9. As you can see, this block works great on areas that have a gradual slope and it is ideal for finish work like primer blocking. |
 |
10. Here we are using a round block made of foam insulation with a piece of round plastic in the center to give it rigidity. You can easily make your own from supplies found at your local hardware store. |
 |
11. Here is an example of where this shape is particularly useful and this is why we have so many different shapes on hand. The variations from car to car are virtually endless. |
 |
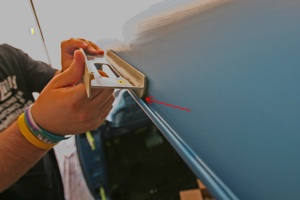
12. We drew arrows on the car to show you how we turn the block as we sand. Simply twist your fingers as you go back and forth along the panel in nice long stokes to create a criss-cross pattern. It takes short strokes with lots of twisting to remove material and longer strokes with less twisting for finish work. |
 |
13. We made these little blocks out of soft rubber so they would flex to fit the varied shape of the fender. Notice that the ends have been rounded to prevent them from gouging. |
 |
14. To fill large spaces we spread the material with small pieces of metal or plastic. If you make the spreader too wide the ends will get in the way and it is difficlult to make a straight line if you go too small. We generally use these two sizes with stick-it paper. We never work on panels off of the vehicle because they may change shape during installation. |
 |
15. This foam block works good for complicated pieces. Notice that we took out the center tube so it would flex and then cut the foam open so it would flex even better. Of course you can buy blocks premade like this if you want to spend the money. |
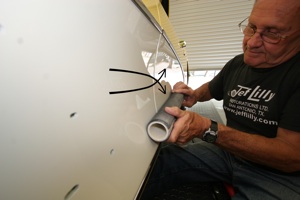 |
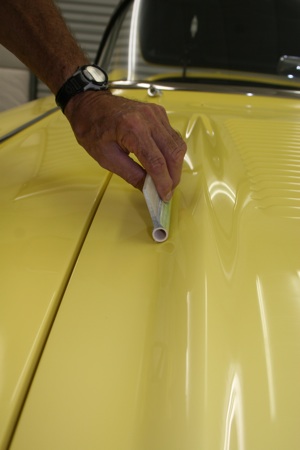
16. We made this block from PVC pipe. We rolled contact cement on before applying the rubatex rubber to the surface. PVC pipe is very straight in short pieces, doesn't weigh much and will last forever. As before, we use a twisting motion as we go back and forth while being careful to not let the ends of the PVC dig into our work. |
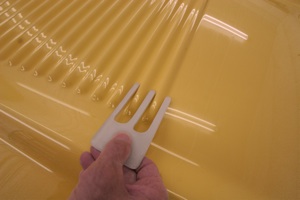 |
17. For unusual pices such as these louvers we make special grooved blocks out of various thicknesses of Lexan. We typically make them with various gaps between the fingers so we can taper the louvers properly. |
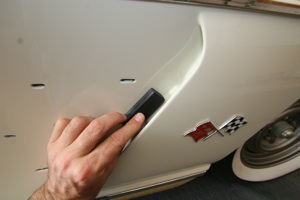 |
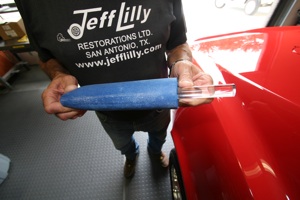
18. For simple rectangular shapes we cut pieces of Durablock rubber as needed. In this instance we needed a block thin enough to reach under the overhang but thick enough to hang onto. |
 |
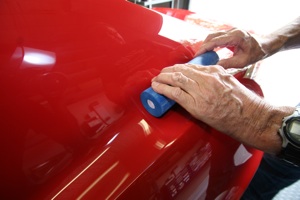
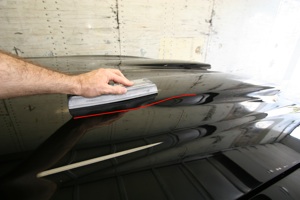
19. Here's another example of making a block to fit a particular need. In this case we glued a plastic handle onto a piece of PVC for ease of use. It worked well for working the transition along this hood. |
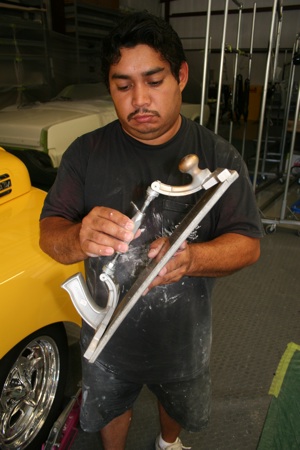 |
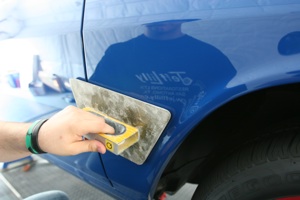
20. We made this extra wide block from an adjustable lead file so we can set the contour when a lot of sanding is called for. This block can be quickly adjusted to the shape of the panel as you work. |
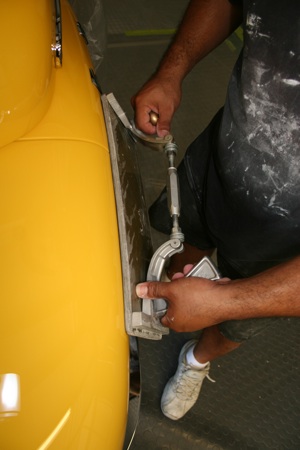 |
21. This block was adjusted to fit the convex shape of the fender. The goal is to have as much contact with the surface as possible, while keeping the ends from digging into the panel. |
 |
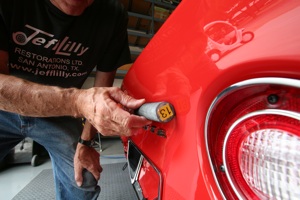
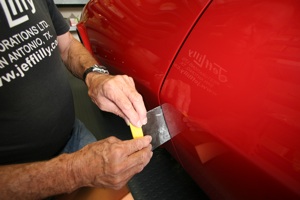
22. These round corners call for a small block of Lexan. The reflection in the tail gate proves that it was a good choice. You can buy Lexan from stores that sell plastic in a variety of thicknesses. It's easy to cut with a hacksaw or bandsaw. You can then countersink flathead screws into the sanding side for a handle and cover them with a piece of rubber. |
 |
23. Here we made a block with the appropriate angle to get into the corner, thus avoiding gouges that would be left by standard size blocks. |
 |
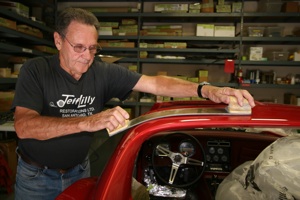
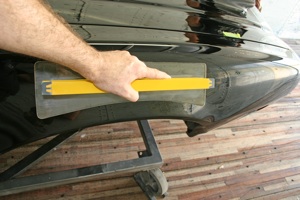
24. This large curved surface called for long flat block that gave us about a foot of contact in the center. Notice that the block is held lightly to control how much material is removed. If the vehicle moves you are pushing too hard, which will tend to cause a dip. |
 |
25. How you hold the block and position your body is important to get the criss cross pattern needed to achieve the best results. Whenever possible we sit on a chair with wheels to help reduce fatigue. |
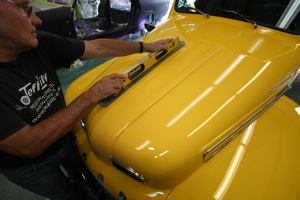 |
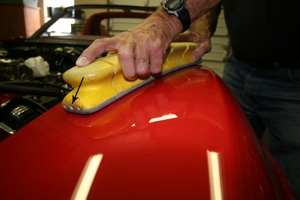
26. In this picture we are using a standard long wide block to shape the hood. We like to use aluminum levels for our handles because they are light, flat and easy to drill for attaching the Lexan. |
 |
27. Here we are using a piece of Durablock to work around the hood scoops. |
 |
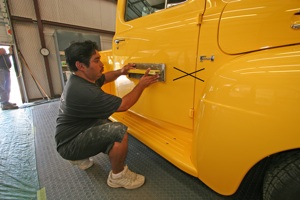
28. Here is another custom piece of Lexan, cut on an angle to avoid gouging the edge. A lot of our work is to remove imperfections that came from the factory. Most bodyshops would not be so particular but show quality cars require the best. |
 |
29. This fender lip called for a block with an arc cut out of the side. As you can see, one block might only be used for a very small area. |
 |
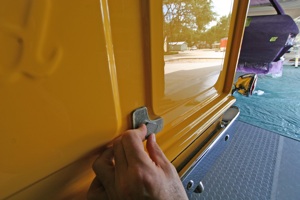
30. Here a narrow block is used to sand along the edge of the drip rail. |
 |
31. And here we give it another pass with a thin piece of Lexan covered in masking tape to prevent unwanted scratches. |
 |
32. This is what makes all the hard work worthwhile.. |
Jeff Lilly Restorations
11125 F.M.1560 N
San Antonio, Texas
210-695-5151 - www.jefflilly.com
11125 F.M.1560 N
San Antonio, Texas
210-695-5151 - www.jefflilly.com