


Last Reviewed:
April 11, 2026
| These techniques will work for any custom trim that you want to build. All you need is the right amount and correct size of brass. | |
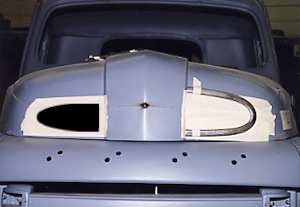 |
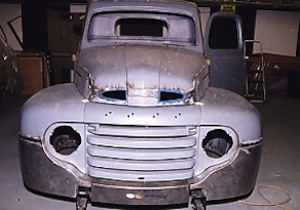
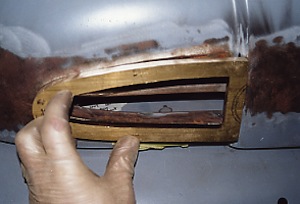
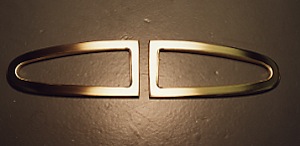
1. Our goal is to make some new trim pieces for the front of the Truck. We shaved the hood down a few inches so now we want to reduce the size of the nostrils, making the original one on the right the size of the new one on the left. |
 |
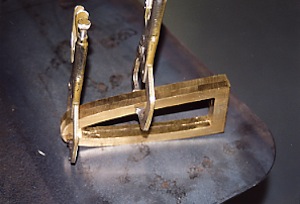
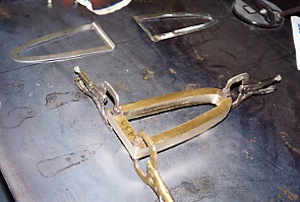
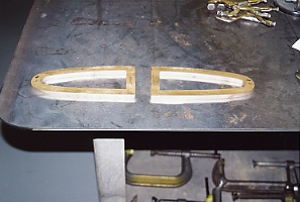
2. We started by making two templates to find the best size. |
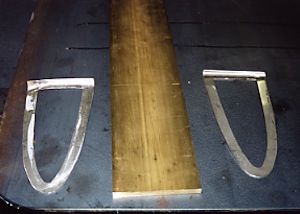 |
3. Then we went to work with half-inch thick brass plate the overall width of our new pieces. We use brass because it is easy to work with and works will with the chrome platting process. |
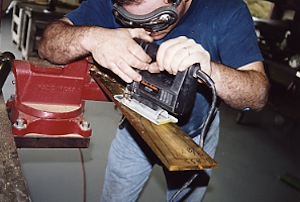 |
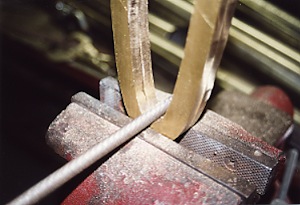
4. After tracing the shape from the template we used a jug saw with a metal blade to make the first outside cut. |
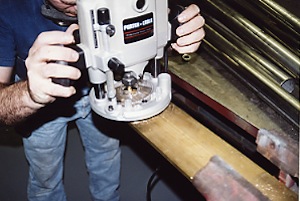 |
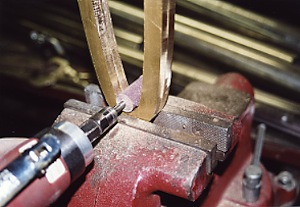
5. Then we cut out the center with a carbide bit in a router. |
 |
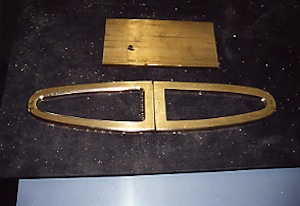
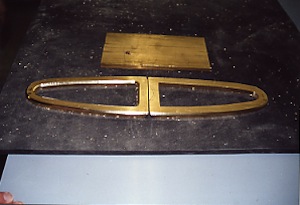
6. Here you can see the results of our first cuts. We gave the outside cut a margin so we could do a more accurate job on a band saw. |
|
|
|
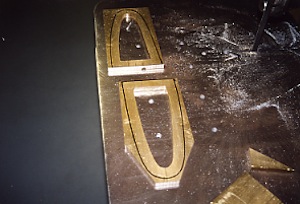 |
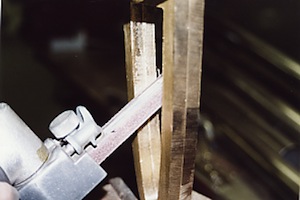
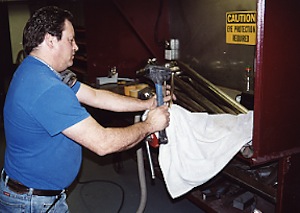
7. Now the two pieces are clamped together. This will eliminate to do the finish sanding twice and make both pieces identical. |
 |
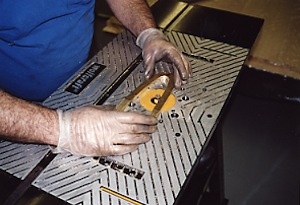
8. We used a grinding cone in a die grinder for the second cut but there is still more work to be done. |
 |
9. This small belt sander helped to smooth out the round grinding grooves. |
 |
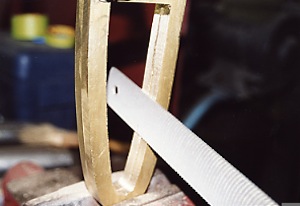
10. We used a flat file for better control on the sides. |
 |
11. And a round file to clean up the corners. |
 |
12. Here we are admiring our work. |
 |
13. As you can see here the flat trim needs to be shaped to the contour of the hood. |
 |
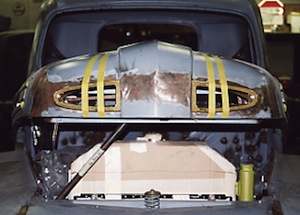
14. And here we have taped the pieces onto the hood so we could step back and assure we were happy with the look. |
 |
15. We also use this opportunity to mark the location for the attachment screw holes, and then drilled the holes in preparation for threads. |
 |
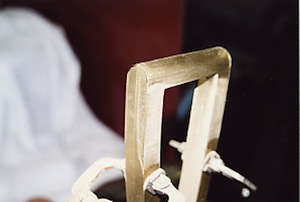
16. Here we are using the router mounted in a table to put a round edge on the inside and outside edges of the front side. |
 |
17. Frequent checks are done to assure the desired results. |
 |
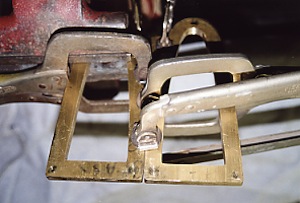
18. In this picture you can see the difference between the one that has been rounded (on the left) and the one that has not. |
 |
19. And this picture shows that we wrapped the pieces in a soft rag for protection before hammering them into shap with a plastic dead-blow hammer. |
 |
20. After frequent comparisons to the hood we are finally ready to tape our work on for one last inspection. |
 |
21. The final step for us was to hand sand the pieces with 80 grit, followed by 400 grit and polishing until we had a mirror finish. Then off to the chrome shop for a coat of copper nickel and chrome. |
 |
23. The job is finished and everyone is happy with the look! |
Jeff Lilly Restorations
11125 F.M.1560 N
San Antonio, Texas
210-695-5151 - www.jefflilly.com
11125 F.M.1560 N
San Antonio, Texas
210-695-5151 - www.jefflilly.com